4 Ways To Delete Records From a Table
Update 11.01.2022: Added a new way to delete records from a table -> There are 4 ways now.
Select record -> Delete -> Yes…really delete. Next record. Rinse and repeat. 100 times. Have you ever found yourself in a situation like this where you had to delete 100 records or more in Business Central? Often the reason is that Rapid Start packages have been used to insert masses of incorrect data into the system. The nasty, nasty Rapidstart!
Now how to you delete records in Business Central? In good old C/SIDE we would have simply executed the table and deleted the records. In Business Central we no longer have this option. But don’t worry. We do have other ways to get rid of this annoying wrong data.
I am aware that there are already posts on this topic out there. But from my point of view none of the posts was so detailed that it was sufficient for me alone. Some information was always missing. In addition, there are so many changes from version to version in Business Central that you never know if the information is really up-to-date. That’s why I decided to write something about the topic myself.
In this post we look at the following possibilities:
4 Ways To Delete Records in Business Central
- Delete Records Using “Edit in Excel”
Open a page. Use “Edit in Excel”. Delete/modify the records in excel. Publish it.
- Delete Records Using the Record Deletion Tool
Download the Record Deletion Tool from Github. Install it. Create a backup of your data. Open the page “Record Deletion”. Select your records to delete. Use the function “Delete Records”.
- Delete Records With Configuration Packages
Create a new Configuration Package. Select your table. Export the Package. Delete all records except one. Import the package. Apply the package.
- Delete Records Using the Table Data Editor
Download the Table Data Editor from Github. Install it. Open the Data Editor. Load the table. Filter or select for the relevant records. Delete the records.
Delete Records Using “Edit in Excel”
This is by far the easiest way. If the Excel AddIn for the Business Central Webclient is installed, we have hit the jackpot.
In this case you open any page – e.g. the Page Customers. Click on the PageActions “Page” -> “Edit in Excel”.

Excel opens. Here you make your changes and confirm them with “Publish”.

After successful update, the following message appears: “Publish successful – workbook updated”.

If the AddIn is not installed, you can follow this link to get more information. There you will also find the requirements that are necessary to use the Excel AddIn.
I quote the information from Microsoft:
“For Business Central on-premises, the Edit in Excel action is only available if the Excel add-in has been configured by your administrator, and only available for the Web client. For administrators, if you want to learn how to install the excel add-in, see Setting up the Excel Add-In for Editing Business Central Data. “
Note: Tables with transactional data cannot be deleted using this functionality.
Delete Records With the Record Deletion Tool
Clone the Record Deletion Tool. Add a new launch.json with the connection parameters of your Business Central instance. In the screenshot below I use a “launch.json” for Business Central 17.
If you are using a version other than Business Central 17, you will also have to adjust the “app.json” accordingly. Then publish the app from Visual Studio Code.

To install the app in production environments, compile the project and manually upload the generated “.app” file via the “Extension Management” page.
Use the search function (tell me) in Business Central to open the “Record Deletion” page.

Use the function “Insert/Update Tables” here. This ensures that the list is filled with all tables from the database. If you add new tables to the database at some point, just run the function again to update the list.

For all tables you want to delete, check the box “Delete Records”. I only select the table Customer.

With the function “Clear Records to Delete” you can remove the mark for the tables to be deleted.
Now is the time to delete the records in the selected tables. Please make sure to do a backup of your data before doing this. A good idea would be to copy your company before doing this so you have something to fall back on.
Once you have created the backup, use the “Delete Records” function.

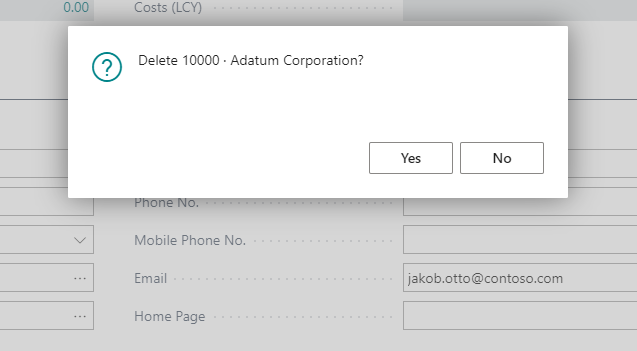
A new dialog opens and asks if you really want to delete the records. Confirm with “Yes”.

At this point you are finished.
The Record Deletion Tool can do more than just delete records. For more information about this I would like to refer to Olof Simren’s original post. The functionality has not changed since.
Unfortunately, it is no longer possible to filter on the field “No. of Records”, because something has changed in the implementation of the field. (“The type or method ‘Table Information’ cannot be used for ‘Extension’ development.)
From Roberto Stefanetti you can also find a tool to delete records here. It was developed for an older version. I have not tested it myself, so I cannot say anything about whether it still works.
Delete Records Using Configuration Packages
This way is the most complex from my point of view. But it has the advantage that you neither need the Excel Addin nor any apps installed. Instead you use the standard functionality of the “Configuration Packages”.
Open the “Configuration Packages”. Click “New” to create a new Configuration Package.

Fill the fields “Code” and “Package Name”. Then click on the three dots in the “Table ID” field to select your desired table via the lookup.

Important: After you have selected your table, check “Delete Table Records Before Processing”!

In the next step you export your table to Excel.

Then open the downloaded file.

The file looks like this:

Select all lines below the headings by clicking and dragging down the first number.

Then delete the lines with a right click on the left margin and the command “Delete”.

At this point we insert a new record. This is necessary to be able to use the “Apply Package” function later. If we leave the lines completely empty here instead, the “Apply Package” function has no effect.

Go back to your “Configuration Package Card” and call the function “Package” -> “Import from Excel”.

If it asks you to check related tables, click “No”.

In the dialog that appears, confirm once again by clicking the “Import” button.

In the “Configuration Package Card” you next call the function “Actions” -> “Functions” -> “Apply Package”.

Confirm the following dialog with “Yes”.

Finally, a window appears, telling us which records have been modified or inserted.

Delete Records Using the Table Data Editor
Clone the Table Data Editor. Install the app on your Business Central instance.
Open the data editor. Select your table. Select the records and delete the records as shown in the gif below. The gif was taken from Volodymyr Dvernytskiy and shows the process.

For more information, check out Volodymyr Dvernytskiy’s blog post about his Table Data Editor.
That’s it. Have fun trying it out. 🙂
Mentions
11 thoughts on “4 Ways To Delete Records From a Table”
Great Post, great tool options to use, I too miss Object Designer… If I may add one more thing…
Just to be mindful that there may be other tables with records referencing the records you are trying to remove. That would cause a problem then down the road.
For example, records in Table 246 – Requisition Line table are removed…..(Requisition Lines, Planning Lines, Order Planning Lines are stored in this table) but there may be records in Table 99000829 – ‘Planning Component’ table referencing a line you remove in table 246. Then you have a problem down the road. This one came to my desk a few times in the past few months.
Again, Good tools, just need to be mindful of table relationships and how they work with one another.
Hey Bryan,
thank you for your comment.
Good point with table 99000829.
I will check that one and update the tools.
Kind regards
Hi Waldemar,
Can you change the Title of my response from 2021-03-05 to “My thoughts” instead of “9 Thoughts”:)
Also, can you add the following:
Please BE CAREFUL when DELETING DATA or using CONFIG PACKAGE!!! Again, Good tools, just need to be mindful of table relationships and how they work with one another.
Remember…. “BAD DATA = BAD PROBLEMS”
I see stuff like this come across my desk all the time:
SCENARIO 1:
Transfer Order for Lot Tracked Item was shipped. Then, for whatever reason, User uses Config Package to Export Data, removes records they “think” don’t belong, and then imports them back in while ‘Delete Table Records Before Processing’ is marked. (WARNING!) Guess where the Lot Number is stored for the Transfer Receipt?? Yup, in this table 337, and now it is gone. Not good. “BAD DATA = BAD PROBLEMS” 🙂
Scenario 2:
DP&P Location (Full WMS) – User uses Config Package to load Warehouse Item Journal, but ‘From Zone Bin’ and ‘From Bin Code’ are blank. Typically, we don’t show this field, it is in the background, but is the ‘Adjustment Bin’. When they post, now only 1 Warehouse Entry is created for the Bin they add stock to. There is not “offset” Adjustment Bin entry, so now ‘Calc. Warehouse Adjustment within Item Journal does not pull anything in. Now you have un-synch between Warehouse and Inventory. Not Good. “BAD DATA = BAD PROBLEMS” 🙂
Scenario 3:
Use Config Package to copy Job Planning Lines from one Job/Company to another Job/Company. Be very careful with the ‘Contract Entry No.’ field. This comes over from other company or if it is blank… Not Good. “BAD DATA = BAD PROBLEMS” 🙂
Hez Bryan,
thanks for you additions. Unfortunately, I cannot change your original answer.
Good points! 🙂